Description
Windows 10/11 comes with tons of features packed & its the most liked & used operating system by worldwide computer users after windows 7. While these features are good for most of the users out there, many users aren’t liking many of these because either windows 10 lags on their computers or run slower. In this post i will be showing you a few ways to increase performance of windows 10 by disabling some built in functions that will help windows run faster on your pc.
Instructions
Step #1 – Clean & Remove Unwanted Files
This will give you a little boost in performance & will also clean up your hard drive. It will delete all the temporary files that are created by programs & you won’t have to manually wipe out data from the temp folder. So, follow these:
- Go to Start menu & search for “Disk Cleanup” & Open it.
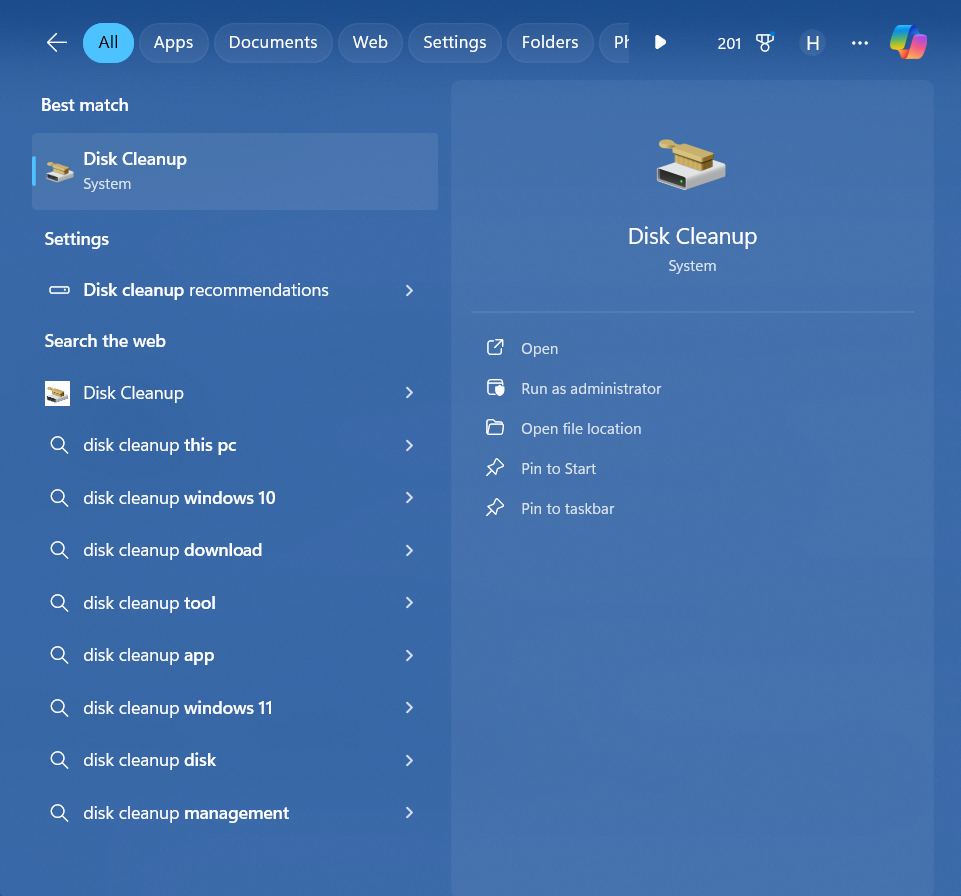
- Select drive you want to clean & Hit “OK” button
- Wait for it to analyze the drive, once analyzed, Select All the files & Hit “Clean up system files” button at bottom left.
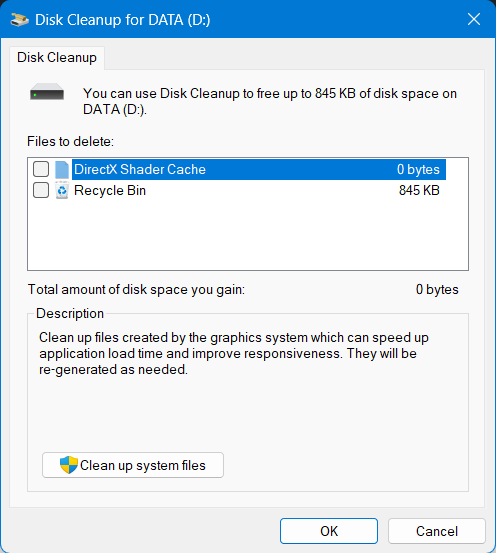
- It will delete all unwanted files & temporary files from system.
Step #2 – Adjust for best performance
It may give you some performance boost in your windows as this will disable any fancy settings from the windows & remove any shadows or customizations. Your pc will look basic, but trust me, its worth it! Follow instructions:
- Open up File Explorer & Right click on “This PC” & Click Properties
- Now, click on “Advanced System Settings” from left side & wait for another window to load.
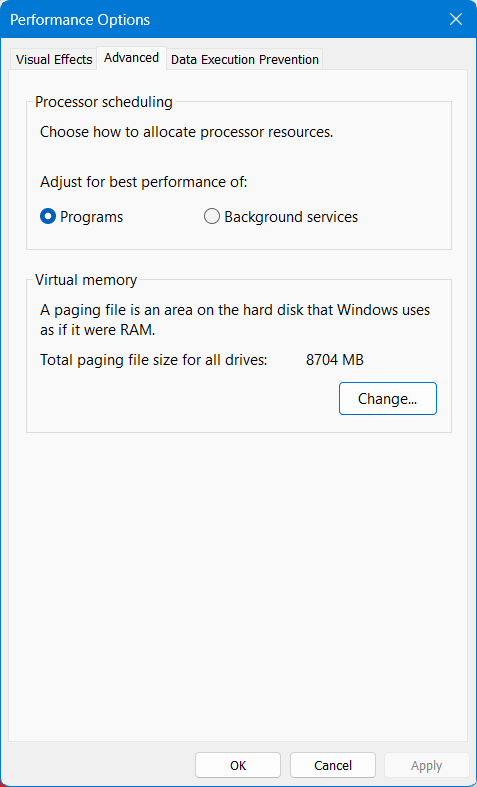
- Make sure you’re on “Advanced” Tab & Under “Performance”, hit “Settings” button
- In next window, select “Adjust For Best Performance” & hit “OK” button. (You may use custom plan if you need any customized options)
Step #3 – Disable Background Apps
In this step, we will be disabling background applications that are running in windows background for no reason. Most users are not using these apps, so its worth disabling.
- Go to start menu & Click “Settings (Gear Icon)” & Wait for the settings window to load.
- Click on “Privacy settings” from the opened Settings window.
- Scroll Down until you see “Background Apps” & click on it.
- Now from the list, disable apps you’re not using often, by toggling the switch.
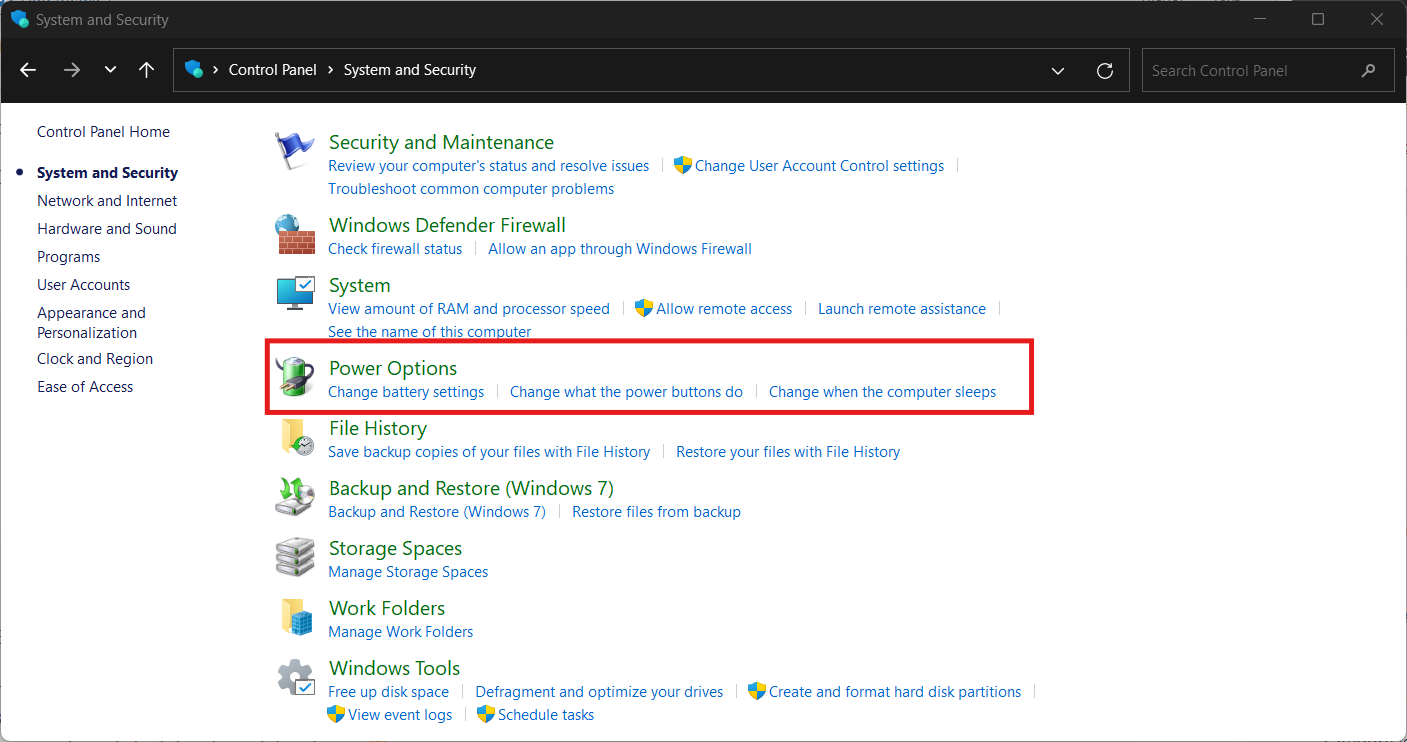
Step #4 – Adjust Power Options
This step will be used to gain most performance out of your hardware but will consume more power, its good for desktop users who’re running on power rather than a battery. This drains power but provides with performance boost to the user.
- Press Down “WINDOW KEY + R” from the keyboard & you will see the run box. Type in “control” & Hit enter.
- From Control Panel, Click on the “System & Security” Hyperlink & wait for next window.
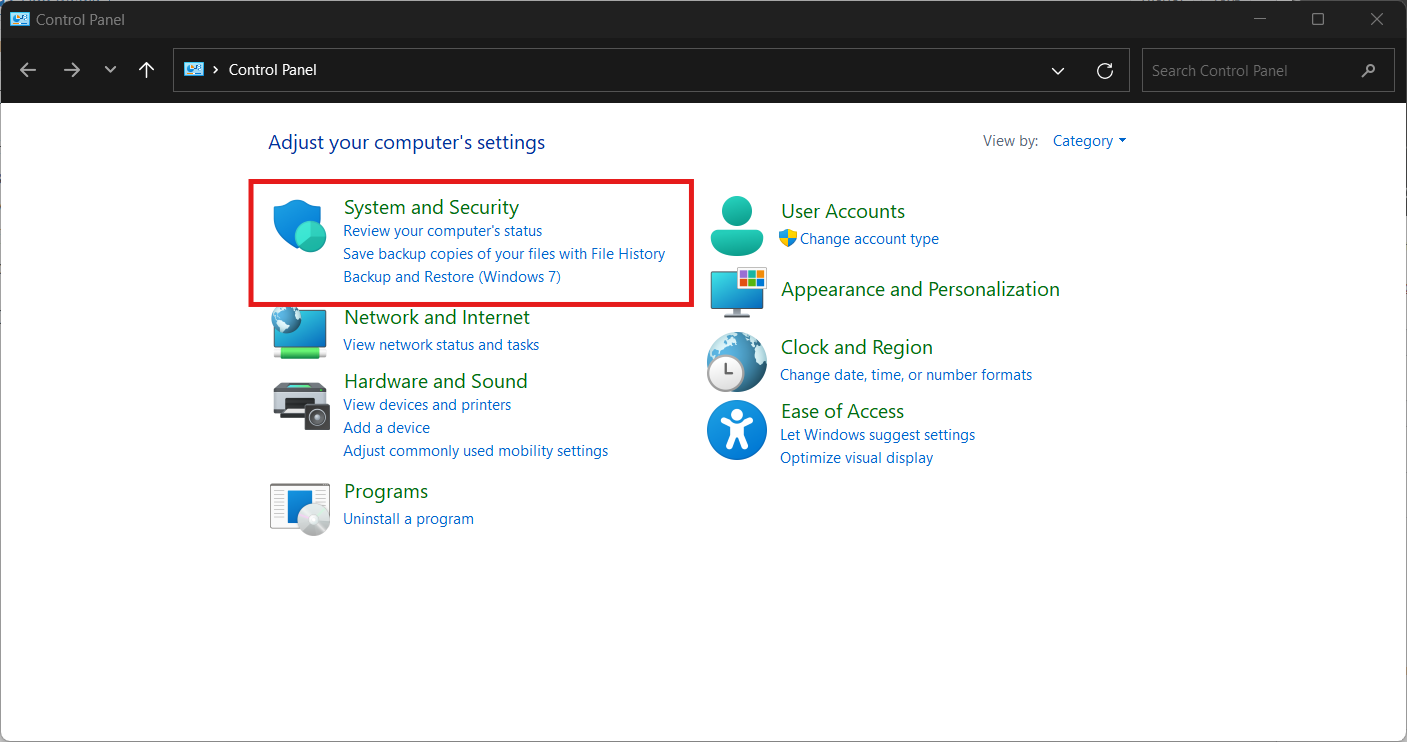
- Now click on “Power Options” from the window & in next window, select “High Performance” plan. (If options isn’t available, it may be hidden in “Additions Options” toggle)
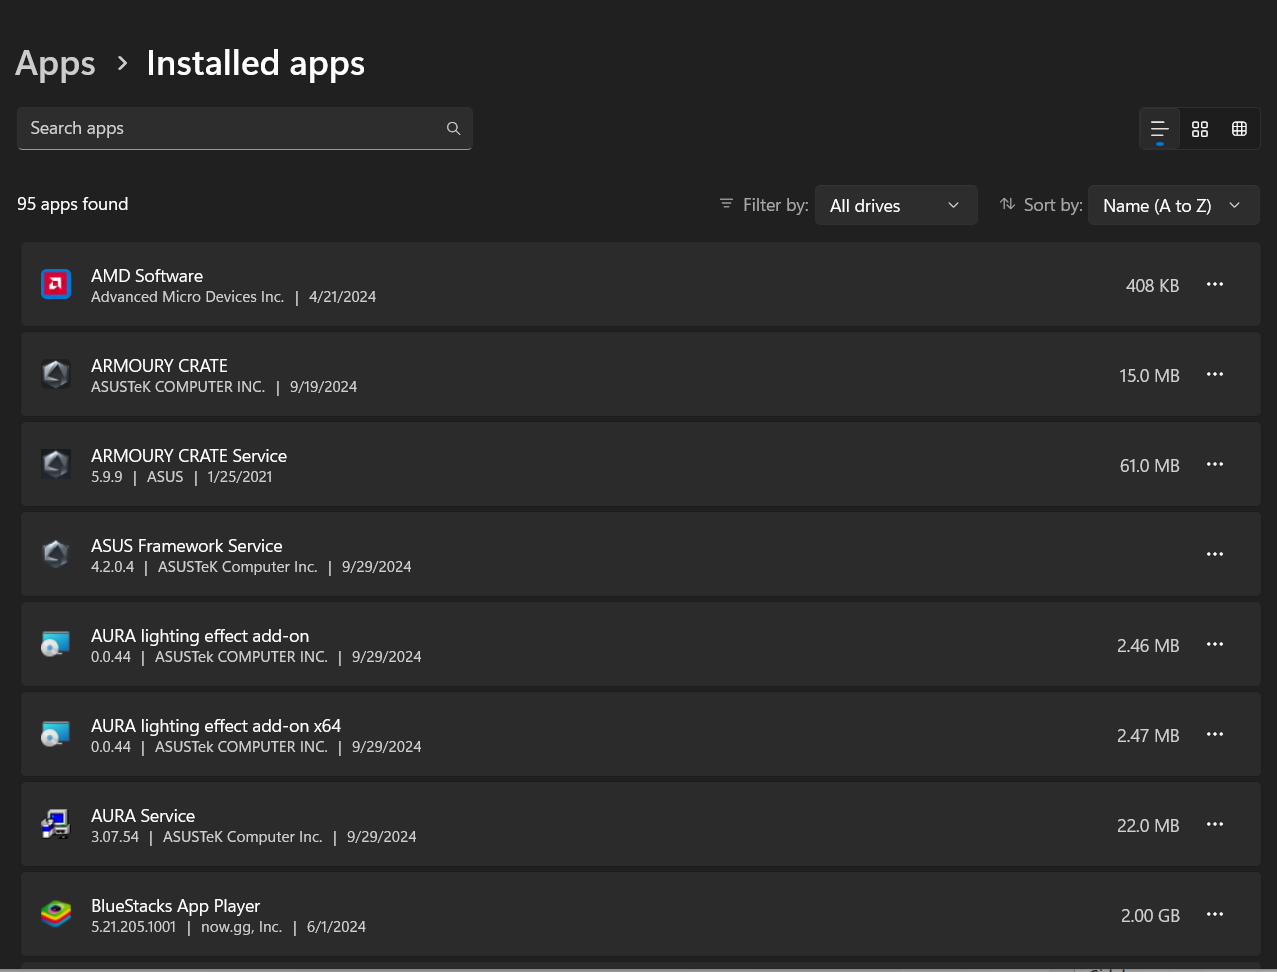
Step #5 – Uninstall Unwanted Applications/Programs
Uninstalling programs, always helps up freeing up some space & here it helps gaining performance too, because many apps are installed on windows as services & many of them are always running in background, which slows down your computer. Follow instructions below:
- Click on Start menu button from bottom right corner & then click on “Settings (Gear Icon)” button
- Click on “Apps” hyperlink from the settings application & wait for next window.
- Now, you will see a list of installed apps, uninstall all the unwanted apps & programs from the window.
Step #6 – Disable Startup Programs
This will give you a minor boost in the Boot process by disabling unwanted startup programs that slows down startup process.
- Open up Task Manager by right clicking on taskbar & clicking “Task Manager”.
- Now, click on “Startup” tab & you should see a list of all programs that are started with every time your system boots.
- Disable program from starting on starting by left clicking on the app & click “Disable” button in bottom right.
Step #7 – Boosting Startup
Essential setting to interact with if you have only a single os installed, computer will boot up faster than before after you’ve done settings below:
- Open up “Run” window by either pressing “WINDOW KEY+R” from keyboard or by right clicking on the start menu & clicking run.
- Type in “msconfig” in the run window & hit enter key from keyboard, wait for the window to load.
- Once the window is loaded, click on “Startup” tab & change “Timeout” from “30” to “10 or 5” seconds, depending on your choice. (You can set it to 0 if you have only a single OS installed.) & Hit the “Apply” button.
- Now, click on “Advanced settings” & Check the “Number of processors” checkbox & set it to the maximum no. of processors you have, then click OK & Click “Apply” then OK again.
Step #8 – Disabling Cortana
Cortana is a cool app & is recommended by microsoft itself. Microsoft recommends it to each windows users whereas most users aren’t using it, so if you’re one of them who aren’t using cortana, then this setting will help you up gain a minor performance by disabling cortana.
- Click on the “Search bar” from the taskbar in windows 10 & wait for the cortana menu to popup, Next click on the gear icon & wait for the menu settings to load.
- Turn everything off & Disable any settings, also disable “SafeSearch” by setting it to off.
Step #9 – Defrag Hard Drive
This step is recommended if you’re running on a hard drive because it will give a bit performance & your pc will boot up in less time.
Note: Not recommended for users with SSD, as this process won’t change anything & will make your ssd only slow.
Steps
- Click on the start menu & Search for “Defrag”, then open “Defrag & Optimize drives” app.
- Select Your system drive & hit the “Analyze” button & wait for it to analyze your drive.
- Click on “Optimize” & wait for it to optimize your drive.
Final Notes
These above steps will help you get most performance out of your windows 10 by compromising with some customizations & settings. Post will however be updated with time as i can find more settings to gain some performance in windows 10. Please show your support using comments & let me know if you need tutorial or guide on any topic.